
Filtra:
Safe hydration, a reality for all.
For many communities, clean and accessible water remains out of reach. In my Physical Prototyping Methods (HCDE 351) course, we were challenged to select a UN Sustainable Development Goal and use multiple prototyping methods to design a solution.
Our team chose to focus on Goal 6: Clean Water and Sanitation. We asked ourselves: What if there were a way to expand access to safe drinking water, especially for those who are often excluded? Guided by this question, we set out to design a potential solution that prioritized inclusivity and accessibility.
Use numerous different prototyping methods to address a UN Sustainable Development Goal.
Designer
Researcher
Context
4 HCDE
students
10-weeks
March 2025 -
June 2025
Cardboard
3D Printing
Sewing Machine
Cap Cut
Timeframe:
Tools:
Team:
Role:
Concept and Design
Goals
Implementation
Evaluation
Reflection
Design Process Final Demo:
Concept and Design
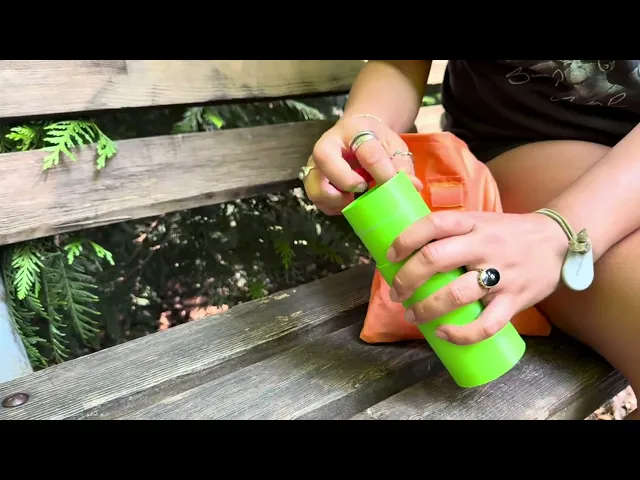
Our prototype, Filtra, aims to address Goal Six of the UN Sustainable Development Goals, which targets providing access to safe drinking water, especially in underserved or emergency-affected communities. While we recognize our design alone can’t solve the complex and global challenges of clean water access, it is a meaningful step towards accessible solutions.
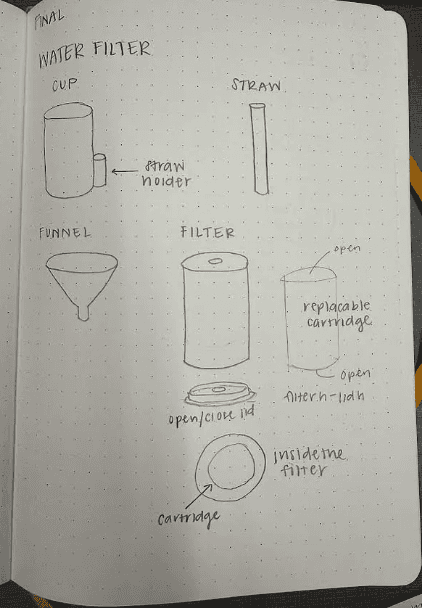
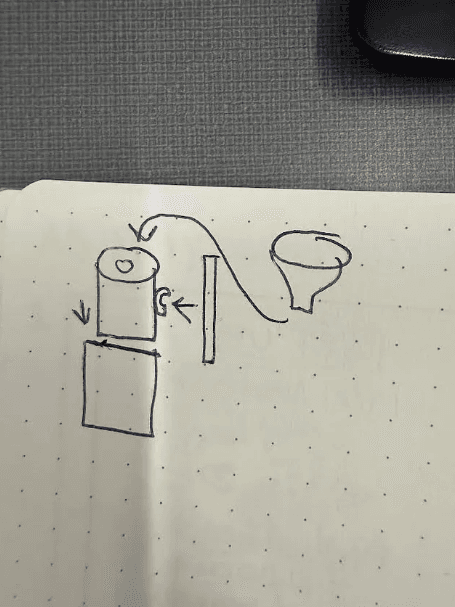
We prioritized a transportable, user-friendly design with a focus on durability, compactibility, water resistance, and a simple set up. When developing the design for Filtra, we planned to have six parts: a filter, an inner cartridge, a cup, a funnel, a straw, and a bag.
Filtra

Goals
Evaluation Criteria
Impact:
Does the water filter promote drinking clean water and/or reduce the use of disposable water bottles?
Desirability:
Are the aesthetics of our design appealing and convenient for users?
Usability:
Is the process of constructing the portable water filter intuitive and easy for users to understand and execute?
Implementation
Cup and Filter
Paper (low fi): A quick prototyping method that allowed our team to get an idea of the filter’s desired dimensions for future higher fidelity prototypes. This low-fidelity prototype also helped us solidify the number of components we wanted and how we want them to fit together.

3D Print (mid-high fi): We created a 3D prototype since PLA filament closely resembles the durability of existing filter products. A more time-consuming prototyping method, which required a lot of iterations in order to get the correct tolerances It allowed us to test for feasibility because the filament for 3D printing is waterproof, allowing water to go through our prototype. It lets us test for usability because it is able to show us how intuitive or difficult it is to construct and deconstruct.

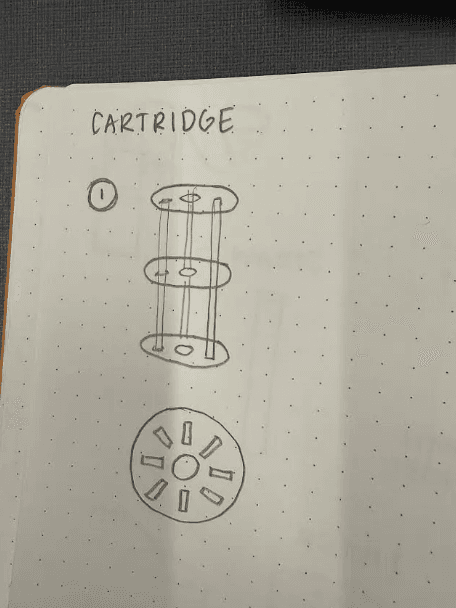
Cardboard (low fi): Allowed us to get an idea of the basic shape and sizing we wanted to have, while being a quick prototyping method. It also tested whether it would be easy to put in and take out of the filter.
3D Print (mid/high fi): The 3D print took us multiple iterations to get the sizing and tolerances correct, which required very small adjustments each time. It also allowed us to test for usability. While the cartridge may not work, it gives users an idea of how it would theoretically filter water, as well as go in and out, and be replaced.


Inner Cartridge
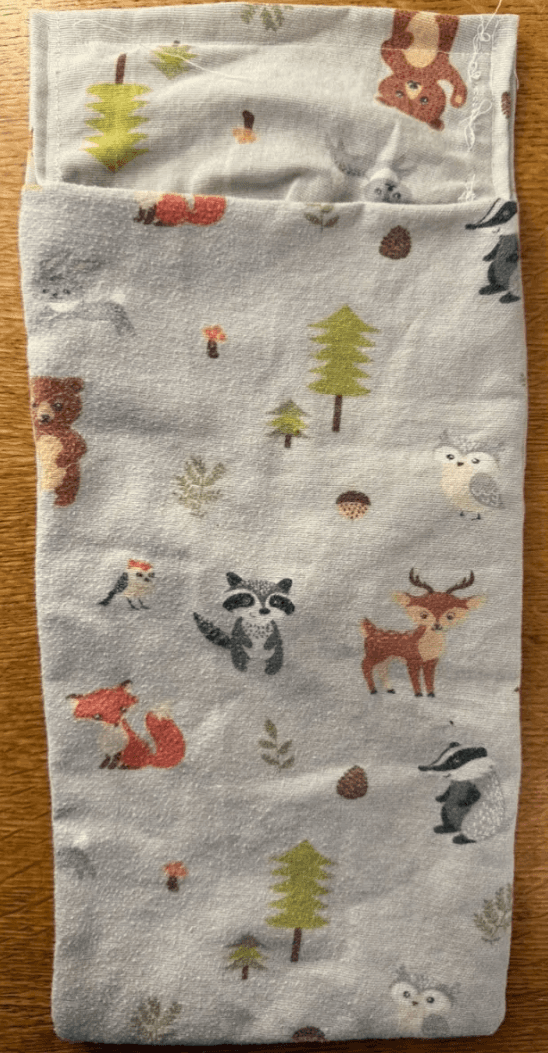
Muslin (low fi): Using scrap material from the MILL, we were able to determine the basic shape and proper dimensions we wanted for the bag. We adjusted this design so that the flap is longer and the overall bag is fitted for the filter in our final prototype.
Sew Bag (high fi): Created from recycled parts of a broken umbrella’s fabric. Allowed us to test for desirability since the bag is made out of waterproof material and can withstand being used outdoors. It also makes storage for all the parts easy when on the go.

Video Prototype: Allowed us to test desirability by showing exactly how the water filter would be used in a person’s everyday life, and it helped users understand why there is a need for our prototype.
Video Prototype: Allowed us to test desirability by showing exactly how the water filter would be used in a person’s everyday life, and it helped users understand why there is a need for our prototype.
Prototype totality
Evaluation
Objective
Protocol and Results
Our team had three users who enjoy the outdoors and have used water filters before testing out our prototype in order to understand its effectiveness in satisfying our design goals.
Could you please construct the water filter without any given instructions from us?
Participants appeared to find the process quite intuitive and did not need help from our team.
What did you think about the process of putting together the water filter? Did you find it easy? Why or why not?
All three participants mentioned that they found the process to be pretty easy to put together and did not need instructions.
One participant mentioned that perhaps labeling the top and bottom parts of the filter would be a nice addition.
Another participant really appreciated the size of the water filter.
What do you enjoy most and least about the water filter?
All participants mentioned that they think the size of the water filter is good for on-the-go purposes.
One participant also brought up how they really enjoyed how the water filter goes inside the cup and that it’s a good design.
Another mentioned that they really enjoyed the bag.
It was also mentioned that something they did not enjoy was that the filter only really works well under a stream of some sort, and not a pond, for instance.
In-class Design Critique
In class, we displayed our final prototype and past iterations for critique. Our peers went around the classroom in a gallery walk manner and left feedback on our designs. We asked them to review our design in terms of our goals, including impact, desirability, and usability.

Positive feedback:
“I love how perfect you got the tolerances. Good job on your iteration process!”
“Good storytelling in the video prototype; it demonstrates your design well.”
“I like that you upcycled the umbrella fabric for the soft goods prototype.”
“I like that you utilized different colors for the 3D prints because it makes it easier to assemble.”
Areas for opportunity:
“Label the top and bottom of the filter to make the assembling process clearer.”
“Adding a handle to the bag might be useful.”
“Iron the high fidelity soft goods prototype for a cleaner look.”
“It was difficult to take apart the inner cartilage; it may be due to the 3D printed material.”
Reflection
I was really proud of the work that my team and I had accomplished in the end. However, this project was not without its challenges. The hardest part of this process was definitely the ideation process and being able to compromise with one another and narrow down to one idea to focus on. However, when we finally decided to hone in on creating a water filter, the process was quite smooth. I was in charge of creating the final demo video, and I was very proud of how I put it together. I really believe that the demo video showed our team’s process with great detail, but also not being very long. Something that I would make sure to do differently in another prototyping project would be to try to start a little earlier so that we would have more opportunities to iterate and create more prototypes.
Working in a team, specifically with the goal of prototyping, can certainly have its difficulties. Specifically, because people want to go in such different directions a lot of the time, which is what happened in my final project group in the beginning. However, this made me really experience and understand how important it is to communicate your thoughts/opinions in a team, but at the same time be open to new ideas and compromising. I also found it to be very beneficial working in a team because we are able to create more prototypes and designs in a short amount of time.